Would you like to see something nasty?
Can I get a collective "ewww" because our carpet is Nasty (with a capital N).
So Saturday morning, while still in our pajamas, we got sick of looking at the grossness and decided this carpet had to go.
And just like that, madness ensued.
We assumed there would be hardwood underneath because the rest of our house has hardwood, but we weren't sure what kind of condition it would be in.
Justin pulled all the carpeting up while I carried it out to our storage shed. Teamwork folks.
We didn't take any pictures of how the flooring initially looked underneath because we got to work right away pulling out all those staples.
That blue nonsense at the bottom of the stairs is me. I told you we did all this in our pj's. . .
After several grueling hours of pulling out staples, this is what we were left with. (You'll have to ignore the tools scattered everywhere - this is real life people).
The new view from the living room.
The landing on the stairs has these adorable small planks. I wish the rest of the flooring in our house was like this!
In the last photo you can see that we still have carpeting in our bedroom. Eventually we'd like to replace that carpeting, that's why we haven't finished off the edge.
So now that the carpeting is up, we have to refinish the floor. We're thinking about staining the wood a darker tone. But since our whole house (except our bedroom) is hardwood, we'll probably start upstairs and then eventually work our way downstairs.
But oh to have floors like this . . .
A girl can dream, right?
So what projects have you been working on lately? Have you ever refinished hardwood flooring? Any tips/advice?
ps: image from here
Showing posts with label renovation. Show all posts
Tuesday, January 17, 2012
What A Wooderful Sight!
Tuesday, November 29, 2011
Light My Fire
I'm pretty sure the "aging University of Miami fan" guess was totally worth leaving you all hanging yesterday. Anyway, we made a purchase. A big one. But first let me give you a little backstory so you don't think we're completely crazy . . .
When we were house searching our wants/needs list included things such as:
- 3+ bedrooms
- 1+ bathroom
- Oil or natural gas heat
- Basement
- Large, spacious kitchen
- Backyard
- Garage
- Fireplace
- Hardwood Floors
. . . You get the idea. Well, we were able to get a lot of things on our list (4 bedrooms, 1 bathroom, oil heat, basement & hardwood floors) - but a few things were just not a part of the brick beauty that we fell in love with.
So we're going to add something. A wood burning stove!
This is an old Vermont Castings Stove. We saw it on Craigslist and decided to drive out to the boonies to check it out. We fell in love immediately, so we handed over $250 and took this baby home.
Here's where the trouble begins . . . actually installing the stove. Luckily my dad is a mason so he can help us with the whole process, because let me assure you it is daunting.
A few things we need to do are:
- Work with our township inspector and homeowner's insurance agent to make sure everything is to code
- Install a slate base for the stove to sit on (it will be raised several inches off the ground) - this is because wood floors are combustible surfaces
- Bore a hole through the wall to attach stove pipe and carry it outside
- Decide whether we are going to use temporary pipe and then build a permanent brick chimney or use double-wall insulated pipe and box it in outside.
There's a lot to think about and a lot of decisions to make. We're still not even certain that installing the stove is a possibility. We may end up having to resell it if the installation process is too costly. We need to do some more research and planning. But, we're super excited about the possibility!
If all goes as we'd like, the stove will end up in the corner of our living room with a raised slate base. And yes, I will sit on the couch and lovingly adore it all the days of my life.
Until we figure out exactly what we're doing with this whole wood stove installation nonsense, there will be no loveseat purchasing. That's why among being beautiful and hot (get it?), this bad boy is also a game changer.
We're seriously crossing our fingers that we can get this installed and not spend a small fortune in the process. And we're very excited to see wood chopping and hauling in our future!
I'd love to hear your thoughts - do you think we're crazy? Have you ever installed a wood stove? Any tips or advice?
When we were house searching our wants/needs list included things such as:
- 3+ bedrooms
- 1+ bathroom
- Oil or natural gas heat
- Basement
- Large, spacious kitchen
- Backyard
- Garage
- Fireplace
- Hardwood Floors
. . . You get the idea. Well, we were able to get a lot of things on our list (4 bedrooms, 1 bathroom, oil heat, basement & hardwood floors) - but a few things were just not a part of the brick beauty that we fell in love with.
This is an old Vermont Castings Stove. We saw it on Craigslist and decided to drive out to the boonies to check it out. We fell in love immediately, so we handed over $250 and took this baby home.
Here's where the trouble begins . . . actually installing the stove. Luckily my dad is a mason so he can help us with the whole process, because let me assure you it is daunting.
A few things we need to do are:
- Work with our township inspector and homeowner's insurance agent to make sure everything is to code
- Install a slate base for the stove to sit on (it will be raised several inches off the ground) - this is because wood floors are combustible surfaces
- Bore a hole through the wall to attach stove pipe and carry it outside
- Decide whether we are going to use temporary pipe and then build a permanent brick chimney or use double-wall insulated pipe and box it in outside.
There's a lot to think about and a lot of decisions to make. We're still not even certain that installing the stove is a possibility. We may end up having to resell it if the installation process is too costly. We need to do some more research and planning. But, we're super excited about the possibility!
If all goes as we'd like, the stove will end up in the corner of our living room with a raised slate base. And yes, I will sit on the couch and lovingly adore it all the days of my life.
Until we figure out exactly what we're doing with this whole wood stove installation nonsense, there will be no loveseat purchasing. That's why among being beautiful and hot (get it?), this bad boy is also a game changer.
We're seriously crossing our fingers that we can get this installed and not spend a small fortune in the process. And we're very excited to see wood chopping and hauling in our future!
I'd love to hear your thoughts - do you think we're crazy? Have you ever installed a wood stove? Any tips or advice?
Labels:
decor updates,
living room,
renovation,
shopping
Friday, October 21, 2011
Living Room Rebuild, Part 5/Reveal
Disclaimer: When I said yesterday that today I'd be doing the living room reveal, I should have said that I would be revealing our living room which happens to be only about 68% complete. The hardest parts (ceiling, painting, fixtures) are finished, but we still have a lot left to do in terms of decor. Oh yeah and trim work. But, just like how you need to meet people where they're at. . . you need to meet our living room where it's at. Even if it's only at a D+ in terms of completion.
First, let's remember where it came from. Water-stained popcorn ceiling, tacky brass fixtures, and poopy brown walls.
The right side of the room. This side is very bare because we still haven't found the perfect loveseat yet. Remember, D+ - the room is still coming along.
This is the view as soon as you walk in our front door.
This is a close-up of our white display cabinet. I got this for free off Craigslist! We are a no-tv family. We may or may not get one in the future, but for now it just gives us more time to paint and conquer house projects :)
First, let's remember where it came from. Water-stained popcorn ceiling, tacky brass fixtures, and poopy brown walls.
![]() |
| Sorry the photo is grainy, it's a listing photo from our realtor |
And now it looks like this. . .
You can't see all the recessed lights in this picture, but we have 2 rows with 3 lights each. And they're on a separate switch so you can choose to have only one row on if desired. Ya know, mood lighting :)
The front side of the room.
This picture is the most zoomed out I could get.
This is the view as soon as you walk in our front door.
This is a close-up of our white display cabinet. I got this for free off Craigslist! We are a no-tv family. We may or may not get one in the future, but for now it just gives us more time to paint and conquer house projects :)
A few close-ups of our fall decorations.
*My amazingly-talented husband painted that bird. Isn't she pretty?
Our guard cat. Seriously, check out her smile.
And lastly, the ceiling fixtures I attacked with a can of spray paint. I used Rustoleum Painter's Touch Ultra Cover, color: Flat Black. It took 3 thin and even coats to achieve the black beauty look.
So there it is, our living room after the ceiling room demo but still before the arrival of decor/loveseat.
Here is the list of what we'd still like to do in that room:
- Hang art/pictures on walls
- Get a rug for the front door
- Get a loveseat
- Paint trimwork
- Find/make throw pillows (I can't seem to find ones I like anywhere, so I may end up having to make some)
Okay, if anyone is still here after my ridiculously long post - what do you think? Do you know of any places to find great textured off-white throw pillows? What are your weekend projects?
**crickets**
Alright alright, I'm done.
Labels:
living room,
renovation,
room reveal
Thursday, October 20, 2011
Living Room Rebuild, Part 4
Next up? Painting!
We painted the ceiling first. Since there was new drywall up, we had to prime it.
![]() |
| Photo from Lowes.com |
about the entire gallon to cover the ceiling. Drywall is super absorbent that's why you want to make sure you prime it - because primer is cheaper than paint!!
When we first started, Justin was cutting in around the edges like usual... using our trusty Wooster brush. But, then I remembered that our friend Steve had given us his old Shur-line edger. Now, I have to be honest, at first we were skeptical.
Like how does Santa get to all those houses in one night skeptical.
But - the little thing is a gem! A true diamond!
![]() |
| Photo from Lowes.com |
| It really does make cutting in so much easier! A few tips though: you'll want to dab the edger off on the paint tray so you get all the excess paint off - otherwise it will come out gloppy. You'll also want to keep steady and even pressure when you're going along the walls. |
Check out the edger in action!
While Justin was going around and painting the edges, I was rolling the ceiling. And even though we don't have any pictures to prove it - you've just gotta believe. It's like faith :)
Once the ceiling was primed and painted (we used Valspar Interior Eggshell in Ultra White by the way), we moved on to the walls. That poopy brown accent wall needed to go.
We taped all the possible paint colors up on the wall and let them gel for a while. We needed to see how the colors interacted with the room - make sure they got along. Eventually we decided to go with Heavy Cream for the main walls and Warm Buff for the accent walls. For the main walls we used Olympic Paint & Primer In One Interior Eggshell Enamel in Heavy Cream. And for the accent wall we used our trusty Valspar Interior Eggshell in Warm Buff.
We continued the same process of Justin edging and me rolling.
Again, it's called faith people. Once the main walls were finished, it was time to do away with the poop.
And now . . .
At first we were worried that the color was too light. It definitely looked darker in the paint swatch. But after living in the room for several weeks we can honestly say that it's pure love. The lighter color really helps brighten the room and bring out the nice wood floors.
Anyone else do any painting lately? Did the color turn out like the swatch or did you have any pleasant surprises? Make sure you come back tomorrow for the final living room reveal (and then you can see what I did with those brassy fixtures)!
Wednesday, October 19, 2011
Living Room Rebuild, Part 3
After the lighting was installed and the ceiling was still wide open, there were 2 very important issues we needed to solve.
1A. The joists in the ceiling were not level
2A. The upstair's bathroom shower creaked
Here's how we fixed these two issues. . .
1B: Before we ripped out the old plaster ceiling there was actually a spot where you could see a slight sag. So before we put the new ceiling back up we knew the joists needed to be fixed. No sense in putting a new coat of paint on an old broken car, right?
Well, like most things, Justin was the go-to man for this project. But I'll try to explain how he corrected these issues the best I can from my limited understanding of the whole process. Some of the joists were thinner from top to bottom, so Justin added an extra board to thicken the whole joist up. And for the joists that were sagging down too far, he had to shave some of the extra wood off.
* I just made the whole process sound really easy, but it did take some preparation before Justin knew exactly how to correct the problem.
2B: In order to solve the creaking shower, we used Hilti Foam Sealant from Home Depot.
This was one of those few times when the whole trial-and-error approach actually worked for us. We knew that the shower was creaking because there were pockets of air under the floorboards, so we thought if we could fill the pockets in then the creaking might actually stop. Well, lo and behold, it actually did! It was surprisingly fairly simple and the steps were as follows:
A. Drive to Home Depot and pick up Hilti Foam Sealant
B. Justin aims can up in to the floorboards and sprays generously
C. Regan runs upstairs to the shower and walks around to see if it creaks
D. Small creaks show themselves
E. Justin sprays some more foam
F. Regan walks around in the shower again and - - VICTORY!!
*Random note: Yes, I did just type in third-person. Don't judge.
Now that our ceiling was straight as a board and our shower was creak-less, we were ready to drywall. Our friend Jon and his cousin Aaron came over to help us put the drywall up. It took a few hours and basically consisted of 2 boys holding the drywall up while the other nailed it into place. I busied myself making lunch for the workers and taking pictures.
The whole process of actually getting the drywall up didn't take too long. The three guys knocked it out in a couple hours. But then came the mudding and sanding. I still have tremors about this part. For those of you that have never done this before let me warn you, the drywall dust gets everywhere. And I mean EVERYWHERE. We lived and breathed drywall dust for several days. Ick. I didn't take too many pictures because I didn't want the little dust particles to destroy my camera.
1A. The joists in the ceiling were not level
2A. The upstair's bathroom shower creaked
Here's how we fixed these two issues. . .
1B: Before we ripped out the old plaster ceiling there was actually a spot where you could see a slight sag. So before we put the new ceiling back up we knew the joists needed to be fixed. No sense in putting a new coat of paint on an old broken car, right?
Well, like most things, Justin was the go-to man for this project. But I'll try to explain how he corrected these issues the best I can from my limited understanding of the whole process. Some of the joists were thinner from top to bottom, so Justin added an extra board to thicken the whole joist up. And for the joists that were sagging down too far, he had to shave some of the extra wood off.
* I just made the whole process sound really easy, but it did take some preparation before Justin knew exactly how to correct the problem.
2B: In order to solve the creaking shower, we used Hilti Foam Sealant from Home Depot.
![]() |
| This photo is from the Home Depot website. |
This was one of those few times when the whole trial-and-error approach actually worked for us. We knew that the shower was creaking because there were pockets of air under the floorboards, so we thought if we could fill the pockets in then the creaking might actually stop. Well, lo and behold, it actually did! It was surprisingly fairly simple and the steps were as follows:
A. Drive to Home Depot and pick up Hilti Foam Sealant
B. Justin aims can up in to the floorboards and sprays generously
C. Regan runs upstairs to the shower and walks around to see if it creaks
D. Small creaks show themselves
E. Justin sprays some more foam
F. Regan walks around in the shower again and - - VICTORY!!
*Random note: Yes, I did just type in third-person. Don't judge.
Now that our ceiling was straight as a board and our shower was creak-less, we were ready to drywall. Our friend Jon and his cousin Aaron came over to help us put the drywall up. It took a few hours and basically consisted of 2 boys holding the drywall up while the other nailed it into place. I busied myself making lunch for the workers and taking pictures.
| Measuring what size to cut the sheet of drywall |
The whole process of actually getting the drywall up didn't take too long. The three guys knocked it out in a couple hours. But then came the mudding and sanding. I still have tremors about this part. For those of you that have never done this before let me warn you, the drywall dust gets everywhere. And I mean EVERYWHERE. We lived and breathed drywall dust for several days. Ick. I didn't take too many pictures because I didn't want the little dust particles to destroy my camera.
| Jon showing Justin how to tape and mud |
| Justin taping and mudding |
Several days later, once the ceiling was taped and mudded and sanded, we were left with this. Since we were ready to paint now - it was off to Lowes we went!
So has anyone else felt the horrors of drywall dust? How many showers did it take you to get it all out of your hair?
Tuesday, October 18, 2011
Living Room Rebuild, Part 2
Yesterday I left you hanging with this photo of a white wire trailing from Justin's arm.
That white wire is indeed the start of our installation of recessed lighting. When we bought the house the living room was dark and only had the ceiling fan/light as a source for lighting. Even worse the switch to turn the light on was on the other side of the room, so if you came home after 7pm you had to walk across in darkness and feel for the light switch. My fear of the darkness + my clumsy nature = a need for better lighting!
Off to Lowe's we headed . . . We purchased 6 Halo 5" New Construction Airtight IC Recessed Light Housings and 6 Halo 5" White Open Trim Recessed Lights. Even though 6" is more typically seen in homes, we decided to purchase 5" lights because they aren't as much of a focal point visually and they still put out enough light.
Rather than hiring an electrician, Justin chose to install the lights himself. Before he began, he spent many nights researching and planning how to install these without electrocuting himself. Once he had his trusty notes handy, it was time to start the project!
| If you're like me these notes might as well be in Chinese. |
Side note: Our house was built in 1947 and the front walls are brick with plaster on top.
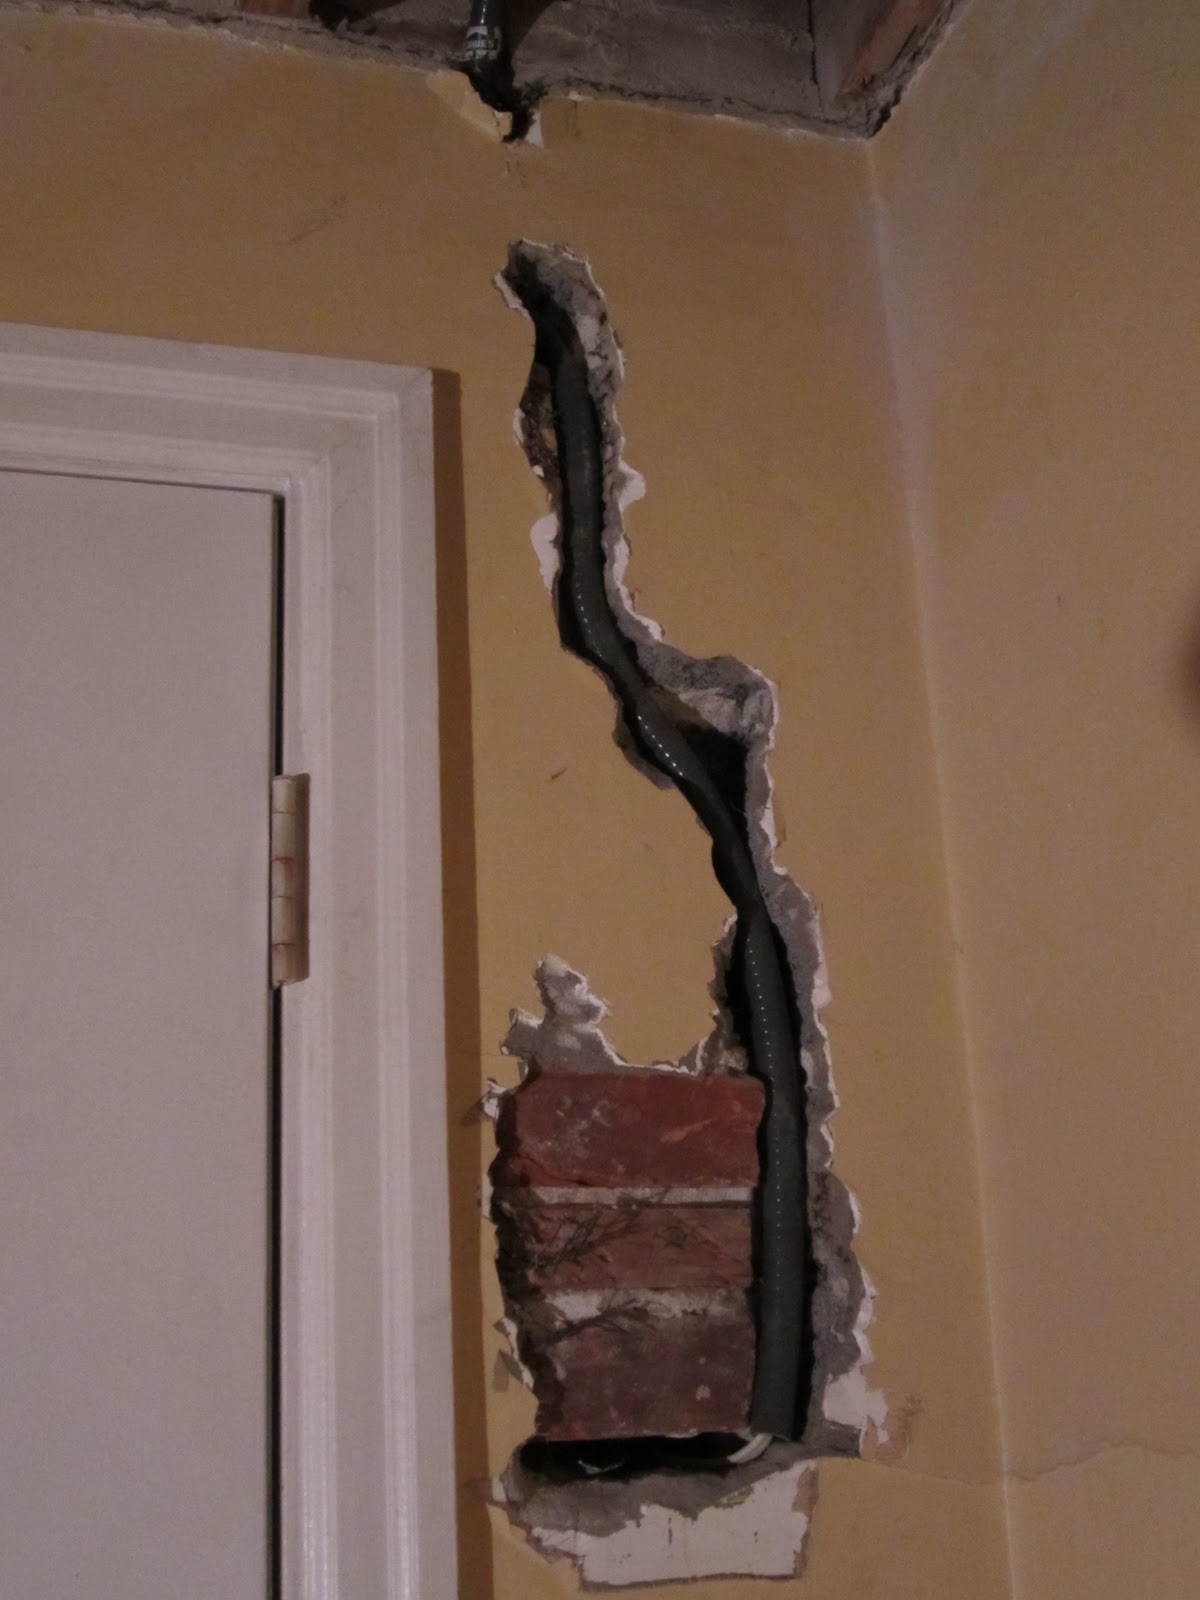
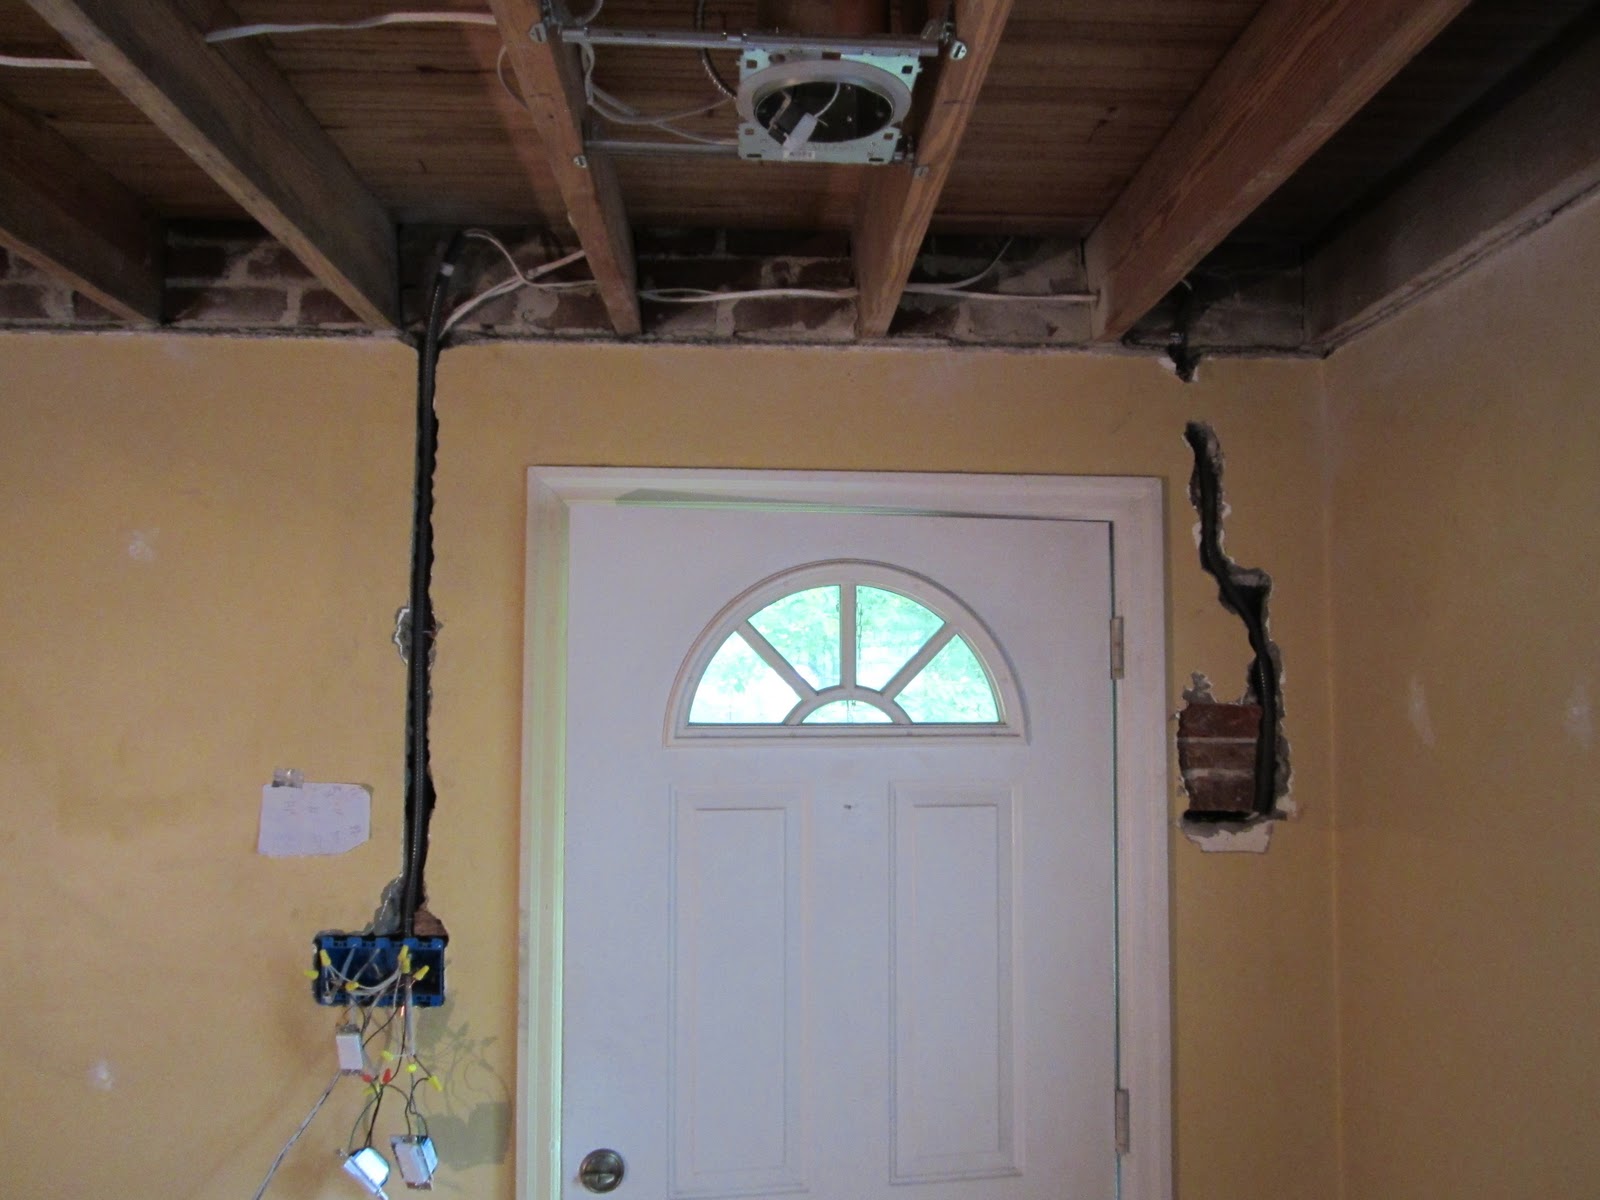
This created a minor issue. The wires were not easily accessible because the walls were tight masonry walls. In order to access the wires, Justin had to remove a portion of the wall.
If you think that looks like a mess you might want to shield your eyes from the next picture.
Hey, at least the trusty notes are taped above the disaster.
The light installation took us (I use that term loosely) a couple weeks. But, my dear sweet husband managed to figure it all out and he got all 6 housings up and wired! And I'm not even going to pretend that I had a clue as to what he was doing . . . because I didn't.
Monday, October 17, 2011
Living Room Rebuild, Part 1
Five days after we moved in to our new house, Justin & I started to get the itch to demo. So on our first Friday in the house, we tore the living room ceiling down. We were so eager to get started we didn't even take any before pictures. The only photos we have of this room pre-rothenbergers are the tiny listing photos from the realtor.
Please excuse the fuzziness - I tried to enlarge them so you can see how truly terrible the ceilings were. These pictures don't do justice to the large water stains and cracked popcorn ceiling. Just imagine that if our ceiling was a celebrity it would be Charlie Sheen . . . yeah it was that big of a mess.
So after several hours of chopping away at the ceiling, we were left with a ginormous pile of plaster on the floor. Since we hadn't thought through this project, I started calling trash removal companies around 8pm on Friday night. The prices I was getting quoted for waste removal were around $400 - so after Justin kindly picked my jaw up off the ground we moved on to Plan B. Find someone with a truck (this is key) to haul the construction waste for us. And, drumroll please, here is where our dear friends Jeff & Jewel ran to our rescue!
These two are troopers - they drove 2 hours to our house and hauled our ceiling away for us! Jeff & Jewel - if you're reading this, we owe you. Consider yourselves 2 Snickers bars the richer :)
Then we were left with this . . .
PS: See that white wire trailing away from Justin's hands? More on that tomorrow . . .
Labels:
demolition,
living room,
renovation
Subscribe to:
Posts (Atom)